A 2016 meta-analysis used a systematic review to show that the low back, shoulder, and knee regions were the most commonly injured locations found among varying full body weight and power lifting exercises (1). The deadlift is a full body closed chain integrated movement that can be done a number of different ways with differing equipment. The main muscles used are commonly referred to as the posterior chain, most notably the gluteals, hamstring, erector spinae, and adductor muscles, as well as entire abdominal cavity. There are a multitude of ways to break up any lifting exercise, but I will break up the standard deadlift into three phases: the static start phase, the pull or ascent phase ending with the lockout, and the descent phase. This will allow us to simplify the faults, and match them to the phase they are most occur in. It is important to remember that the individual athlete’s anthropomorphic form will dictate function, and thus as athletes start to get more comfortable with the complexities of the lift or are progressing in rehabilitation from various injuries their form can change. That being said, the underlying principles of this section will guide the clinician towards honing in on areas of commonly seen movement faults and sites of tissue break down to make the lift as safe and effective as possible.
Prior to the lift have the athlete watch you or another person perform the lift from multiple planes while explaining the what, where, and why of the most common faults seen at each phase. It may be important to talk about proper stance width, grip type, external equipment use (such as wrist wraps, weight belts, shoe selection, knee wraps, bar type), and lifting goals with special emphasis on the muscles of focus and purpose of the lift itself. Watch the patient perform this complex power lift from at least 2 planes in order to get the full kinematic picture before deciding what to optimize.
Tune in next week to learn the different phases of deadlift…
Here’s the continuation of the The Deadlift: Purposeful and Functional Loading, and below are the different phases of deadlift
A. Static Start Phase
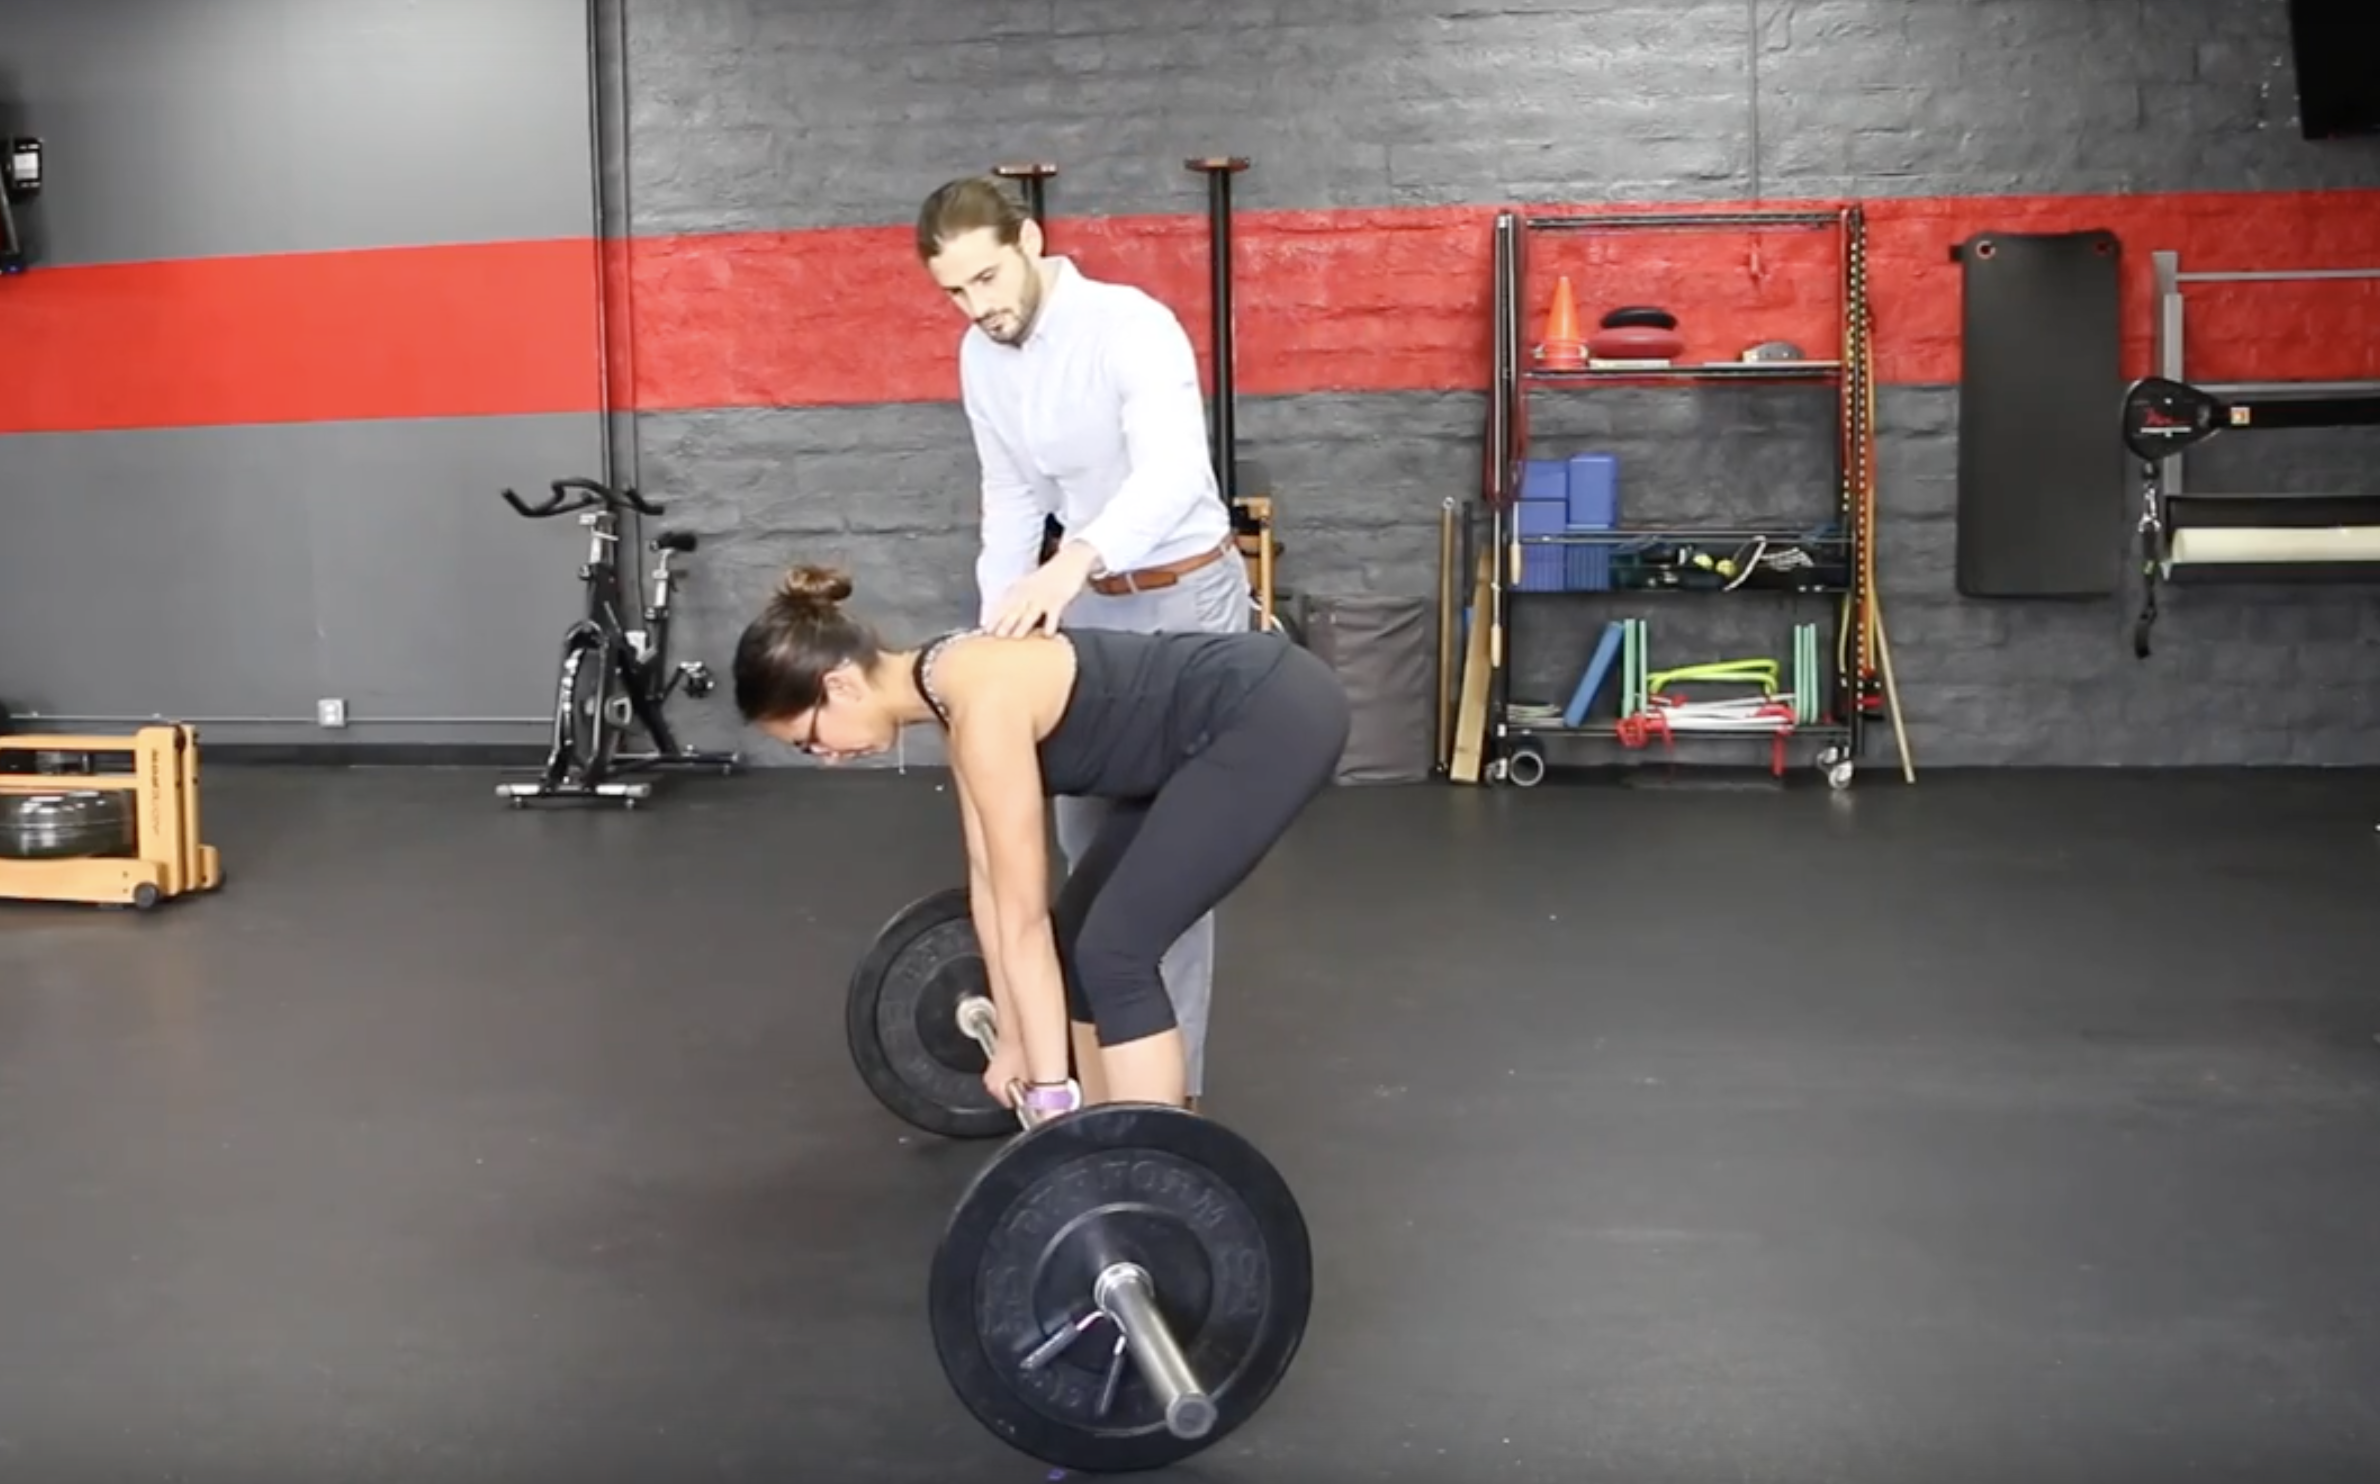
At the starting position of the deadlift we want our athletes in a position that will maximize perpendicular bar path and vector force from the ground without putting any anatomical structures under excessive or unnecessary shearing, compressive, or torsional forces. This means starting with specific resting muscle tension and stored potential energy, with the hips higher than the knees, weight back into the heels, and the bar making contact with their shins. Many of the studies in this article that have focused on the deadlift or power lifting have shown that the low back is the overall most common source of tissue breakdown. Therefore let’s take a moment to unpack why this could be. It is thought that the correct way to start this lift is with the weight resting on the floor, where the athlete must have adequate low back, hip, knee and ankle range of motion and be able to support all structures in this position with significant tissue wind up and potential energy. It is erroneous to think that every lifter is capable of starting this lift from the floor with a safe neutral lumbar spine position, considering that each person's torso, femur, tibia, and arm length vary drastically. This, plus soft tissue factors lead to limits in starting position with the weight on the floor. The most common movement fault and poor compensatory pattern that can be seen in order to lift a bar from the ground at this phase is starting the lift with a posterior pelvic tilt with lumbar spine flexion. The underlying principle is that in order to reduce low back injury the athlete must maintain a neutral lumbar lordosis from the start to the end of the lift. Using both in vivo and in vitro analysis with multiple modes of real time imaging and biomechanical computer modeling programs it has been shown conclusively that as the lumbar spine becomes more and more flexed the contribution of the lumbar stabilizing musculature decreases and the supportive force generated by the ligaments and bony tissue increases, resulting in higher shearing forces and increased likelihood for low back injury (11-12). Thus each athletes individual safe full range of motion for this lift starts with the lowest possible bar position prior to a posterior pelvic tilt. Accommodations for bar height can be made by having the athlete start with the weights elevated on steps, block risers, barbell plates themselves, or assisted rack risers. Be sure to educate the athlete that each lifter should start and end the lift with a neutral spine and due to each athlete’s individual body proportions there is no single right way for every athlete to perform the same lift, and this may change with tissue adaptations throughout life.
Another way to add to low back support is through increased trunk stability and activation via ancillary exercises as shown in past months articles. Prior to and throughout the entirety of the dynamic phases of the lift the athlete must activate his or her core musculature in order to increase intraabdominal pressure which has been shown to further add to trunk active stiffness and reduce the sole reliance on the low back musculature. Breathing with these lifts should be done after the entire lift is completed before the next rep with the weight on the ground or at the top of the lift just before the descent, but never in the pull or descent phases. During these phases the systems maximal effort is required, and thus keeping this intraabdominal pressure constant will lead to improved overall trunk stability.
Another area of concern is shoe choice which may affect starting dorsiflexion position, and thus affect trunk and hip starting position. This can be addressed by trying the lift with varying external heel heights or insoles and then getting a shoe to match. Secondarily, since this is a power exercise we want our athletes to choose a shoe whose sole provides a firm, wide, flat stable base which can correct for excessive medial arch collapse if needed. This is very important as we want to make sure that no ground reaction force is lost due to an air or large foam soled running or cross training shoe. Providing a firm stable base to push from, with the deadlift has been shown to reduce the lift’s overall force production and muscle activation (6). In summary for the starting position, make sure the athlete starts with a neutral spine, avoiding a posterior pelvic tilt with a strong abdominal bracing engagement and using a shoe that allows for correct body position accommodating any anatomical foot variances from the ground up if needed.
B. Pull/Ascent Phase
A poor movement compensation commonly seen at the start of the lift is when athletes initiate the pull with a superior eye gaze going into cervical hyperextension, which can lead to cervical structures being compressed and sheared. There are however some schools of thought that purposefully promote cervical spine hyperextension with weight lifting in order to enhance and increase the lumbar spine extension needed for the attempted weight. It is said that the cervical and the lumbar spine both represent developmentally, what is called a secondary spinal curve, and thus have a deeply rooted connection. where cervical spine extension will promote, mirror, and enhance lumbar spine extension. As this connection is still theory, a common way to reduce balance is to have athletes look upwards, reducing the ability for the body to right itself visually and vestibularly. It is safest to keep our athletes close to cervical spinal neutral as possible, with a constant chin neck angle between 60 to 90 degrees, thus avoiding excessive cervical extension and limit stress on the passive structures of the cervical spine. A unique way to train neutral cervical spine position is to have the athlete hold a softball or tennis ball under their chin by nodding down on the ball, pressing it against their manubrium/ jugular notch but be sure to match the chin neck angle to the size of the ball. Next have them perform the deadlift unweighted for form, while holding the ball in place with the pressure from their chin. This will not only turn on the deep neck flexors adding cervical spine stability but it will show them that their eye gaze must change as they become up-righted throughout the lift.
Next, in order to maximize the perpendicular work force during the entire pull phase of the lift it is pertinent that the bar path is a straight line that is perpendicular to the ground at all times. The bar should stay as close to the lifters shins and body as possible, avoiding any sagittal plane motions. As the bar travels away from the shins and body there is a linear increase in the moment arm from the hips, which adds increased shear and strain stressors on the low back, as well as a linear loss in perpendicular power and energy that can and should be corrected. The movement specialist can best identify this fault by watching the bar path from the lateral view. As previously stated, the bar should stay in contact with the shins with weight being more into the heels, hence why many serious lifters may prefer to wear thin shin guards to prevent scrapping the shins. One common fault that can be seen as the athlete clears their knees with the bar, is that the athlete pulls the bar posterior losing a perpendicular path to meet their hips, to finish the lift standing erect. To facilitate a straighter bar path simply have the athlete squeeze their glutes and thrust their hips forward to the bar immediately after the bar passes their knees, instead of pulling the bar back to meet their hips. This will lead to less energy lost in the sagittal plane and a safer constant strain on the low back. Other ways that have been listed in various resources to cue a straight bar path is by using an unlocked Jones machines which uses supportive uprights, videotaping the lift with post lift assessment and reflection, external verbal cues, tactile cues by wearing shin guard and having the athlete purposefully scrape the shin to keep the bar in contact with the body. Also, during the pull phase the majority of loaded tibiofemoral motion will be completed and thus it is pertinent to talk about the most common movement faults seen at the knee and how to avoid them. The most common movement fault seen here is tibiofemoral adduction with or without internal rotation, which can be seen as the knee dives inwards and the thigh rotates. This can be further increased if the foot is set into excessive eversion with the base of support too wide leading to the athlete’s inability to keep the knees tracking over the toes (leading to more femoral Adduction with internal rotation). This fault can lead to increased ligamentous and soft tissue stress and increase the likelihood of patellofemoral irritation. It is important to work with our athletes to find the correct stance which allows them to keep their knees tracking over their toes, avoiding both primary and relative femoral adduction and internal rotation. Also, make sure if the athlete is using knee wraps, as is common with weighted deadlifts, that the knee wrap is applied from medial to lateral thus promoting a tactile facilitation into tibiofemoral external rotation and abduction as wrapping the joint from lateral to medial may seem picky but it will promote facilitation of the athletes knee into a faulty position which is not advised. Finally at the end of the pull we can focus on the low back during the terminal bar position, referred to as the lockout phase. A common fault at this phase is for the athlete to perform the lift in lumbar hyperextension, which can lead to facet joint irritation and undue stress on the low backs passive structures as well as decreased the total time under tension of the dynamic muscular structures. Focus on cueing them to stand straight up and finish the lift by squeezing the glutes and lift the chest with the lumbar spine in neutral not by extending the low back. This poor compensatory pattern may be due to the athlete’s lack of control towards the end of the lift requiring a bony stop to reach the lockout phase or just misunderstanding of how the lift should look at its terminal phase as loaded end range facet joint positions are not advised at the lockout phase of the deadlift.
C. Descent Phase
In this phase the athlete will either be slowly lowering, or dropping the weight, depending on the amount of weight. It is important that it is done with a neutral spine, avoiding a posterior pelvic tilt.
Again, look at lifts from at least 2 planes/views in order to get the full kinematic picture before deciding on what to optimize. See below for a much more detailed version of the lift broken down into 2 planes can be seen below in the “Deadlift Movement Fault Guide” and “Quick Look Movement” along with the supplementary videos and pictures. I strongly urge you as a movement specialist to further look into books by Dr. Stuart McGill, professor of spine biomechanics at the University of Waterloo, who’s books focus on evidence based lumbar spine and high level sports related lifts and motions. Also, look into Mark Rippetoe’s “Starting Strength” book for a professional biomechanical power lifting approach, or Ma Strength’s recently translated Chinese evidence based Olympic lifting manual and videos on various social media where you can get a plethora of different evidence based training tips and ideas. Along with these great resources I frequently look into published kinematic studies of various lifts. Having said this if you follow the recommendations above of the most common faults seen at each phase you can reduce the chances of unnecessary tissue stress and strain leading to increased risk for pain or injury for your athletes.
Follow us next week to conclude with the evidence in muscle activation during the deadlift compared with other strength lifts.
For the final segment of the The Deadlift: Purposeful and Functional Loading, and below lists the evidence in muscle activation for the deadlift compared to other strength lifts.


